Shocking Circled Text Effect
Thursday, September 21, 2006 Thursday, September 21, 2006
Posted by Admin
step 1: Lets open an new page with (500Wx500h) and filled with black.
 Step 2:
Now type something like your name or anything. Here i typed my name with white color.(The font size must nearly 35-40 with bold for good appearance. It look like this.
Now rasterize the text layer. Now ctrl+click on the text layer, copy the selection and paste it on new layer.Now delete the text layer.
step 3: This is the interesting step. Now select the layer (which was previously pasted on new layer) then Filter>Distort>polar coordinates. Select the polar to rectangle

The Image look like this
Now filter>stylize>wind(select left to right) and the same procedure filter>stylize>wind (select right to left now)

The image look like this
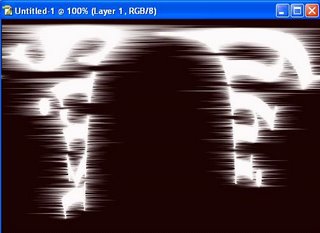
Now select image>rotate canvas >90c, then simply press ctrl+f the image look like this
![]()
now again select image>rotate canvas>90ccw. Now the image look like this.

Now the fun part, Now go to filter>distort>polar coordinates, then select the rectangle to polar. Now the fun part completes
and the image look like this

Now the additional part, take the text tool select the different color and type the same name what you type previously that is here my name, Now try to adjust the text layer to the previous layer. That is like this

The final and last part you may adjust the colors to the design by playing with the hue/contrast

Hope u like this guys :).. if u like this please give ur suggestions.. Thank you one and all.(This was the adopted tutorial .. It was seen very past.. i didn't remember the site anyway thanks to the author for excellent tutorial)


Post a Comment