Happy New Year
Sunday, December 31, 2006 Sunday, December 31, 2006
Hello Friends,
I wish you a very very Warm Happy New year. Here is my New year Greeting :) .
Sunday, December 24, 2006 Sunday, December 24, 2006

Why did you think of designing the site only on Photoshop?
I was a Photoshop instructor and found that there were many Photoshop sites but no directory to find them. Search engines results by that time (1999) were very inaccurate, so I decided to build a "roadmap" to those sites.
Do you use this software for your business?
Yes, but more as a tool. I'm now busy arranging deals with software companies and developing other web sites.
What is your experience of running the Photoshop site?
Incredible! Through these years, I learned all aspects of the web: Building a site, programming scripts, setting up servers, a lot of web marketing and email marketing, etc. I did almost everything related toInternet.
What you supply subscribers in the first newsletter?
An overwhelming amount of resources and tutorials (at least that's what my subscribers say!
Why did you think of starting with second newsletter?
Because I was receiving so positive feedback about my first newsletter. So I wanted to go one step forward and offer a second newsletter with more specific content that could be used as a reference.
Do you find any serious competition to Photoshop?
No. In fact the most serious competition to Photoshop is from Adobe itself: Photoshop Elements. Of course there are a lot of excellent programs, but Photoshop is king.
Tell us your opinion about the third party plug ins.
That's another point that the web was not addressing well. There were little plugin resources and they were outdated except for one or two sites. I wanted to show my visitors that there were a lot of great plugins that they could use. Until year 2001, when AutoFx released it's first version of DreamSuite, the plugin market was somehow sleep. Since that release, it seems that companies started again to produce great plugins. There are a lot of excellent plugins. I try to offer them at my site. Now I'm working with Frischluft, AVbros, AutoFX, Andromeda and HumanSoftware. I will be offering more plugins in the near future.
There are lots of books displayed on your site. Is there a good response to Photoshop books or people prefer training cds?
Both sell well, but there's a big difference in prices so people stick more to books than to training cds, but training cds are also very required.
Do they really interested in textures and ready-made templates?
humm... Regarding textures, there's a certain interest, but there are a lot of free resources, so people stick more to that option than to buy them. Anyway, my Paper Backgrounds are quite unique and it is hard, (if not impossible) to find a similar option. Regarding templates, I'm just started testing them. It seems a hot product, but I'm offering them since December, so I don't have a precise answer. But as you may have seen, there are dozens of template sites, so...
Where you find Photoshop in the future?
In the same place as now: Being the King.
What type of more additions we may see on your site?
Well... I run my site at afterwork hours, so additions are more impulsive than planned. Also, since November I'm facing a BIG bandwidth over usage problem that made me remove many images from my site. As far as I can plan in advance, I will be adding more tutorials and more exposure to great Photoshop plugins and related products.
Your future planning?
I'm leaving on summer vacation (here in Argentina it's the end of summer), so I can only think on resting ;-) Anyway, this year I will be updating and growing The Photoshop Roadmap. And by the end of the year I have plans to start a software company. I have two products in mind: a collections of graphics and design training ebooks and... a Photoshop plugin.
Enrique Flouret, an Architect, worked as Graphic Designer and Graphics Software Instructor living in Buenos Aires, the Capital City of Argentina.Now he run The Photoshop Roadmap and four online stores:
Gender Blending
Monday, December 11, 2006 Monday, December 11, 2006

Create Cyborg
Sunday, November 19, 2006 Sunday, November 19, 2006

Hack Photoshop CS
Sunday, November 12, 2006 Sunday, November 12, 2006

Glamour your Ordinary Dull Photo
Saturday, October 07, 2006 Saturday, October 07, 2006
Helo friends.... i find the rough skin chaning into smooth skin... lets look at this....
step 1:
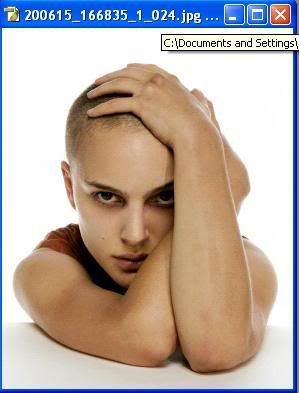
my golden rule is duplicate the layer... now just hide the original layer and the fun begins now... here i take this beauty picture it is a little dull 
step2:
Erase every thing except the skin.... and may use the eraser tool at different opacities at different places.... here i did like this...
step3:
Now after erasing , simply ctrl click on the duplicate layer ... now the image is selected....like this.
step4:
Now go to filter --- blur -- gaussian blur and give the measure as u like ...... i give the radius like this
step5:
The final step is just adjust the opacity as u like .... here is the final image ... thank u very much
 I hope u enjoy this very much...... :)
A Brief and Clear Details on Shadow Effect
Saturday, October 07, 2006

Creating your own brush
Friday, October 06, 2006 Friday, October 06, 2006
 step 2:
now just select the magic tool or lasoo tool and select the part what u want ... here my selection

step 3 :
 step 4 : now open an new document it must be the trasperant mode... and paste the previously cutted image
step 5 : now select the magic tool and select the butterfly.. looks like this

step 6 :
Now go to edit - then define brush preset and name it

 Final Step :
Now out making of custom brush is over now try this just select the brush from the brush pallet now draw where u want... i draw
like this

I hope u like this mini tut..... :)
HUGE ADOBE PLUG-INNS
Wednesday, October 04, 2006 Wednesday, October 04, 2006
Alien Skins Image Doctor Splat Eye Candy 4000 Xenofex 2 Humansoft AutoCorrect v1.52 AutoFocus 1.01 AutoSelect 1.0 Booster Elements 1.0
Magic Frame 1.0
Magic Track 1.5
Photo Surface 1.5
Select v3.01
Squizz v4.0
Squizz v4.4
Textissimo 3.21 AND MANY MORE NEARLY 100+PLUG-INNS
http://rapidshare.de/files/8957653/PSPPDisc2.part1.rar http://rapidshare.de/files/8960124/PSPPDisc2.part2.rar http://rapidshare.de/files/8960181/PSPPDisc2.part3.rar http://rapidshare.de/files/8962977/PSPPDisc2.part4.rar http://rapidshare.de/files/8962833/PSPPDisc2.part5.rar
ADOBE PHOTOSHOP CS+CRACK
Wednesday, October 04, 2006
imaging line, delivers more of what you crave. Groundbreaking creative tools help you achieve extraordinary
results. Unprecedented adaptability lets you custom-fit Photoshop to the way you work. And with more efficient
editing, processing, and file handling, there's no slowing you down
http://rapidshare.de/files/27872503/PS.CS2.part1.rar.html
http://rapidshare.de/files/27877249/PS.CS2.part2.rar.html
http://rapidshare.de/files/27882213/PS.CS2.part3.rar.html
http://rapidshare.de/files/27887998/PS.CS2.part4.rar.html
http://rapidshare.de/files/27899843/PS.CS2.part5.rar.html
http://rapidshare.de/files/27907654/PS.CS2.part6.rar.html
http://rapidshare.de/files/27913390/PS.CS2.part7.rar.html
PASSWORD - HERE - Chronic (All the best)
COLOUR YOUR CAR
Wednesday, October 04, 2006
hey guys.... how you all doing. Here i came with a small tutorial
ok lets start
step:1
Lets open car image and here i opened this image and duplicate it. 
step 2:
now just desaturate the image or ctrl+shift+u, now the image look like this. ok the second part over.
step3:
now select the car part where you want to colorise the car,.... here my selection and give radius 1.
step 4:
In this step just press ctrl+J , for duplicate the selection and press ctrl+u a hue/saturation window opened... in this you can play with the different radius setting for different colours. here is my measures :)
step 5:
This is the last step ok the colorizing is over, but we need to normalize the car mirrors. Just select the front and side mirrors and give radius as you like and delete it... 
Now its over and the final product .

i hope u like this guys.
Shocking Circled Text Effect
Thursday, September 21, 2006 Thursday, September 21, 2006
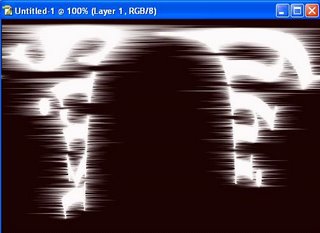
step 1: Lets open an new page with (500Wx500h) and filled with black.
 Step 2:
Now type something like your name or anything. Here i typed my name with white color.(The font size must nearly 35-40 with bold for good appearance. It look like this.
Now rasterize the text layer. Now ctrl+click on the text layer, copy the selection and paste it on new layer.Now delete the text layer.
step 3: This is the interesting step. Now select the layer (which was previously pasted on new layer) then Filter>Distort>polar coordinates. Select the polar to rectangle

The Image look like this
Now filter>stylize>wind(select left to right) and the same procedure filter>stylize>wind (select right to left now)

The image look like this
Now select image>rotate canvas >90c, then simply press ctrl+f the image look like this
![]()
now again select image>rotate canvas>90ccw. Now the image look like this.

Now the fun part, Now go to filter>distort>polar coordinates, then select the rectangle to polar. Now the fun part completes
and the image look like this

Now the additional part, take the text tool select the different color and type the same name what you type previously that is here my name, Now try to adjust the text layer to the previous layer. That is like this

The final and last part you may adjust the colors to the design by playing with the hue/contrast
Hope u like this guys :).. if u like this please give ur suggestions.. Thank you one and all.(This was the adopted tutorial .. It was seen very past.. i didn't remember the site anyway thanks to the author for excellent tutorial)
Sketch Effect
Tuesday, September 19, 2006 Tuesday, September 19, 2006
Here is the tutorial on Converting the color image into Sketch... let see how it will be .....
Step 1:
Lets open the image you want to convert. Here i opened this image
Step 2:
Duplicate the image and desaturate the image.(ctrl+shift+u) It look like this
Now duplicate the desaturate layer.
Step 3:
Now Duplicate the desaturate duplicate layer and invert the image... The image something look like this (shortkey is Ctrl+I).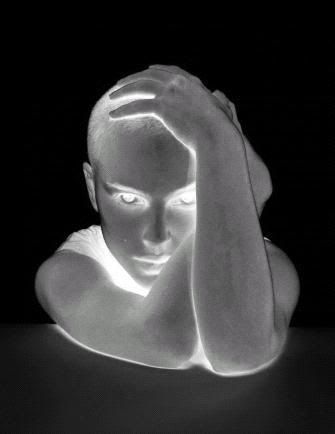
Step 4:
Now in this step we have to going for sketching the image... Just go through this. Now just change the layer mode of invert image to color dodge. The image look like this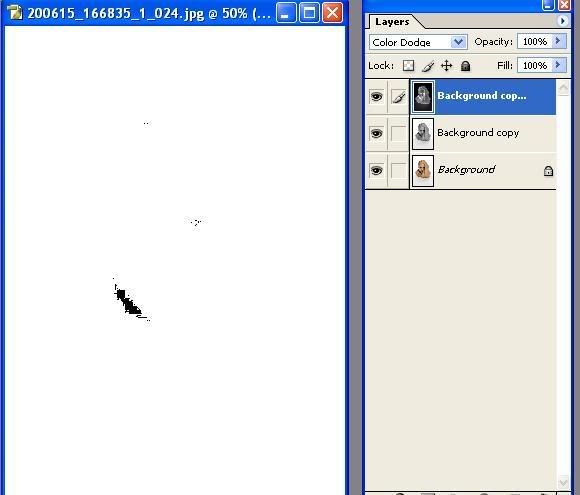
Step 5:
NOw the fun part just simply adjust the "Gaussian blur" like this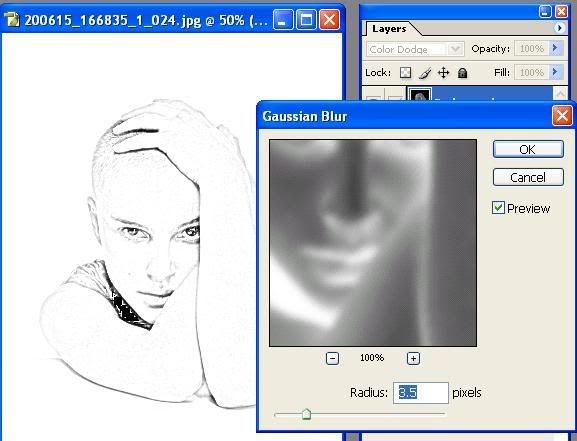
YOu may adjust the radius as You like.
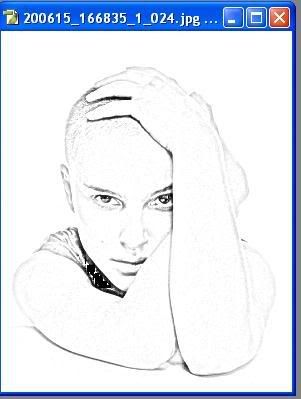
Step 6:
This is the final and last step now the image look like this (You may adjust the image with curves and adjusting contrast/brightness. It is your wish)
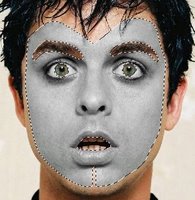
Face painting
Monday, September 18, 2006 Monday, September 18, 2006
No one ask me to write tutorial on "face painting".... It is my personal interest to show the trick to you... and i am not perfect in english to tell you this technique in perfect manner.. But i will try my level best :). So if any mistakes you found please excuse me.ok, Lets begin
Starting With an Image :
Let open the image, and my golden rule is to duplicate the layer
Here i used this image for the face painting effect
but the image must be clear.
Selection :
It is the most important task... the selection should be clear and perfect then only we can easily achieve the effect... let's see my selection
ok, now the selection part is over.But still apply the selection or save the selection. Now go to next step
i mostly prefer each selection is on different layer
Desaturation:
Now the image was in still selection now duplicate the layer(only selection part) and desataurate the image by press ctrl+j.
Here is my Desaturation image
 Applying Face Color :
Now the fun part begins.. now we are going to apply the color to skin that is on face. Its really interesting part why because it was achieved only by the brightness/contrast by adjusting the levels.
So go to image>adjustments>brightness/contrast

Now just adjust the levles as u like (But it only for the black and white combination)
here is my adjusting levels

here is my output of the adjustment of the brightness/contrast

Eyes and Mouth :
Now the fun part with the eyes and mouth just select the eyes and mouth and use the hue/saturation for different color combination. here is my achieved
images of eyes

and mouth

Final stage :
ok we have almost done.... Now just made adjustment for better vision by applying the eyes color or tattos on face whatever it may be.... here is my final product of the "Face Painting"

Ok it's over but you may apply the hue/saturation instead of the brightness/contrast for other effects. here is the example


